Six-Ingredient Peanut Butter Cookies

Fact: Americans eat an average of six pounds of peanut butter per person per year with children being the largest consumers.

Fact: Peanut butter is tasty, heart-healthy, and protein-packed.

Fact: Peanut butter is one of the greatest food inventions of all time.

dsc_0259

Peanut butter covers all the food craving groups: salty, fatty, and sweet. It can be used for sweet or savory purposes in baked goods, in frostings, in stir-frys, spread on toast or fruit, or in a classic peanut butter & jelly sandwichMy favorite way to eat peanut butter, besides by the spoonful? In these cookies.

I love these cookies because they are super simple to make, and you probably have all the ingredients on hand. I made them with ingredients I already had in my dorm room.

dsc_0046dsc_0055You really have no reason not to make them, because even if you don’t have an oven, you can at least make the dough and eat it all (since it’s vegan so no fear of salmonella!). Or better yet, you can try to make them in the microwave by microwaving balls of dough for a minute. They won’t taste as good as the oven version though. The microwave can’t give you those crispy edges like the oven can.

Give these cookies a try! Peanut butter lovers will rejoice at this sweet, delectable, and soft yet crispy cookie (p.s.- my article first appeared on Spoon University).

Simple Peanut Butter Cookies

Makes around 20 cookies

  • 1 cup smooth peanut butter
  • 1 cup brown sugar
  • 1 Tbsp vanilla
  • 2/3 cup flour
  • 1 tsp baking soda
  • 1/4 cup water

Instructions

  1. Preheat oven to 350 degrees F.
  2. Mix together the peanut butter, brown sugar, and vanilla until creamy. This will take around a minute of quick mixing.
  3. Add in the flour a 1/3 of a cup at a time. Mix the batter after each 1/3 cup is added.
  4. Mix in the baking soda.
  5. Mix in the water. If batter seems extremely thick, add in a Tbsp more of water.
  6. Roll the cookie dough into 1 inch balls and place them on a cookie sheet.
  7. Bake the cookies for 8-10 minutes, or until golden-brown and firm.
  8. Once cookies are out of the oven, flatten them with a fork in 2 different directions to give the classic criss-cross pattern.
  9. Let the cookies cool for at least 5 minutes before taking them off the pan and enjoying them.

screen-shot-2016-09-30-at-12-38-30-am

Pumpkin Chocolate Chip Cookies

dsc_0003

The best way to celebrate fall and the beginning of pumpkin spice season is by turning on your oven and baking pumpkin-spiced cookies.

These cookies are a seasonal twist on the classic chocolate chip cookie. They’re adapted from my favorite chocolate chip cookie recipe ever, the chocolate chip cookies in Chloe’s Vegan Desserts. I replaced half of the butter in the original recipe for pumpkin and added in a bunch of quintessential fall spices. It makes the cookies a smidge healthier and adds some flair to them.

The whole recipe came about this past week when a few of my friends and I decided to bake together in the community kitchen. We made pumpkin muffins and had leftover pumpkin… so we decided to add it in to the cookies we’d planned on making. The cookies turned out really well!

dsc_0043

Fun fact, we had to open the canned pumpkin with scissors and a knife because we couldn’t find a can opener, and we had to mix the cookie batter in a saucepan because we couldn’t find a mixing bowl. The cookies still turned out.

I hope you like these cookies as much as we did, and I hope you can mix them in a regular bowl! Let me know if you make them!

Pumpkin Chocolate Chip Cookies

Adapted from Chloe Coscarelli’s regular chocolate chip cookies in Chloe’s Vegan Desserts

Makes 40 cookies

Ingredients

  • 2 1/4 cups all-purpose flour
  • 1 Tbsp cornstarch OR 2 Tbsp more flour
  • 1 tsp baking soda
  • 3/4 tsp salt
  • ½ cup vegan butter, softened (I use Earth Balance)
  • ½ cup pumpkin puree
  • 3/4 cup brown sugar
  • 3/4 cup sugar
  • 1/4 cup water
  • 1 Tbsp vanilla extract
  • 1 tsp cinnamon
  • ½ tsp ginger
  • 1/4 tsp nutmeg
  • 1/4 tsp cardamom
  • 1 1/2 cups chocolate chips (I used Trader Joe’s semisweet )

Instructions

  1. Preheat the oven to 350 degrees F
  2. Cream together the butter, pumpkin, and sugars.
  3. Add in the water and vanilla. Beat the mixture, in a stand mixer or by mixing rapidly by hand, until it is light and fluffy (for around 2 minutes).
  4. Mix in the flour one cup at a time.
  5. Mix in the baking soda, salt, and spices. Mix until batter is just combined.
  6. Add in the chocolate chips. More is better!
  7. Roll the cookies into inch balls on a cookie sheet and bake for 9-10 minutes.
  8. Flatten the cookies when they come out of the oven by slamming the pan hard down onto the counter once or twice.
  9. Let the cookies cool for a few minutes, then enjoy!

Happy early Thanksgiving! What are you making for Thanksgiving dessert?

screen-shot-2016-09-30-at-12-38-30-am

4-Ingredient Microwave Cookies + an Announcement

Hey and happy Wednesday!

Let’s get right to it- I have an exciting announcement. Have you ever heard of Spoon University? If you haven’t, it’s a food writing website for college students by college students. Colleges have chapters, and each chapter makes articles and hosts cool events like this one. I joined my school’s chapter and published my first post today (!!!!).

I am so excited about being involved with Spoon. How excited you ask?

THIS EXCITED.

14708272_1084472334999674_2240262708832252501_n.jpg

Here’s a pic of me and donuts the size of my FACE at an event our chapter hosted this past Monday. 

My article is a recipe of four-ingredient cookies that you can make in your microwave. They’re great for busy college students everywhere because they only contain four ingredients and take like six minutes total to make and bake. They’re healthy enough to make for breakfast, but they’re also a great healthy snack or dessert for those not wanting to gain the freshman 15. Give them a try and show “Cupcake Wars” that you don’t need an oven to make satisfying dessert!

Please check out my first article and tell me what you think! HERE‘S the link. 

cookies


Four-Ingredient Microwave Cookies

Makes 6 cookies

  • 1 banana, mashed
  • 1/4 cup nut butter of choice- I used peanut butter
  • 3 100 calorie packets of oats (about 1 cup)
  • 1/4 cup chocolate chips
  1. Mash the banana in a small bowl or mug.
  2. Stir in the nut butter.
  3. Stir in the oats.
  4. Stir in the chocolate chips.
  5. Form the cookie dough into 2 inch balls. Place on a (microwave safe) plate and heat in the microwave for a minute and 10 seconds.
  6. Take out of the microwave, let cool for a few minutes, and enjoy!

DSC_0216.jpg

I hope your day is as fun as you are.

screen-shot-2016-09-30-at-12-38-30-am

Oatmeal Raisin Cookies

Oatmeal raisin cookies are the ugly duckling of the cookie jar. They seem to always be passed up for the more “appetizing” chocolate chip studded cookies. Poor oatmeal raisin cookies.

dsc_0074These oatmeal raisin cookies are not ugly ducklings. They are tender, perfectly spiced, and filled with plump raisins. The more raisins the better is my philosophy when it comes to these cookies because they add a sweet surprise to each bite.

dsc_0099

I promise you that these oatmeal raisin cookies will not be passed up. They will be eaten faster than it takes for a grape to be turned into a raisin. Actually that’s a bad example since grapes take days to shrivel into raisins. How about these cookies will go faster than you can say, “Baby, it’s cold outside?” Yes, that’s better. And it’s true because baby it IS cold outside.

DSC_0114.jpgYou know how you can warm yourself up though? By turning on your oven and making these cookies. They taste like fall, especially when paired with a pumpkin spice latte* (aka fall’s official drink). 😉 What are you waiting for? Go get out your mixing bowl and prove to the world that oatmeal raisin cookies are not ugly duckings with this cookie recipe. Enjoy!

Oatmeal Raisin Cookies

makes 14 cookies

  • 2/3 cup all-purpose flour
  • 1 cup oats
  • 1/4 tsp salt
  • ½ tsp baking soda
  • 1 + ½ tsp cinnamon
  • 1/4 cup brown sugar
  • 1/4 cup maple syrup
  • 2 Tbsp canola oil
  • 1/4 cup + 2 Tbsp nondairy milk- I used almond
  • ½ cup raisins
  1. Preheat oven to 350 degrees Fahrenheit.
  2. Combine dry ingredients in a large bowl and whisk them together.
  3. Whisk in wet ingredients.
  4. Add raisins and mix dough until just combined.
  5. Spoon dough into balls on a cookie sheet, then flatten them a bit with your palm.
  6. Bake for 8 minutes. Let them cool for a few minutes, then enjoy!

Happy Wednesday! Happy baking!

screen-shot-2016-09-30-at-12-38-30-am

Snickerdoodles (v + gf)


When I was 14, I had my first love (Justin Bieber, anyone?)

You see, I tried a snickerdoodle for the first time when I was 14. It was love at first bite, even though it didn’t have ANY chocolate in it! It was sweet, had a soft fluffiness, and an aromatic cinnamon and vanilla combination. It was a cookie that deserved to be loved.

Not so long ago, I was craving Snickerdoodles. So, like any logical person, I searched through my array of cookbooks for a vegan snickerdoodle recipe. I found one in Let Them Eat Vegan, a cookbook by Dreena Burton. They sounded delicious, but they weren’t gluten-free. I wanted to make them gluten-free because I was making them for my tennis team and one of the girls on the team is gluten-free. She’s also my doubles partner, so together we make up the crazy vegan / gluten-free doubles team!

P1250041

I followed the basics of Dreena’s recipe, but tweaked it by adding gluten-free oat flour to make it gluten-free, as well as adding more cinnamon. They were sweet and delicious! I hope you make them and love them as much as my tennis team and I did!

Snickerdoodles

vegan and gluten-free

adapted from the “Snifferdoodles” recipe in Let Them Eat Vegan, by Dreena Burton

makes 16 cookies

  • 1 cup gluten free oat flour (I made my own by pulsing 1 cup of gluten free oats in the food processor until they became flour) (oat flour can be subbed for regular gluten free flour or whole wheat flour, but I prefer the oat flour)
  • 1/3 cup raw sugar (cane or coconut sugar)
  • 1 teaspoon cinnamon
  • 1/4 teaspoon salt
  • 1 teaspoon baking powder
  • 1/4 teaspoon baking soda
  • 1/4 cup maple syrup
  • 2 teaspoons vanilla
  • 3 tablespoons oil (I used a mixture of vegetable and coconut)

Preheat the oven to 350 degrees F. Whisk together the dry ingredients in a bowl. Combine the maple syrup, vanilla, and oil in a separate bowl. Add the wet mixture to the dry mixture and whisk until combined. Cover the mixture and put it in the fridge for 5 minutes. Roll a ½ tablespoon or so of dough into a ball and place on the cookie sheet. Repeat until you run out of room on the baking sheet or all the dough is gone. Do not flatten the cookies, because they will flatten naturally in the oven. Bake the cookies for 10 minutes, or until they are golden-brown. Let them cool for a few minutes, then ENJOY!

xx Ellie

P.s. – What is your favorite type of cookie? I love snickerdoodles, but I also love chocolate chip cookies and these hippie cookies. Give me a cookie and I will be happy!

Chewy Chocolate Cookies

Chocolate-y.

Chewy.

Sweet.

Is your mouth watering yet? If not, here’s a picture.

P1240939

Still not convinced? What if I told you these cookies were…

Gluten-free.

Sugar-free.

Vegan.

Paleo.

AND had only 3 ingredients!?

Yeah, that’s what I’m talking’ about!

P1240975


These cookies are the perfect pick-me-up snack, sweet treat after a meal, and on-the-go breakfast. They’re great for a SPRING BREAK road trip, since they’re easy to make and easily transportable! Make ’em and pop them in the oven while you pack the car. They’ll be done by the time you’re ready to go, so you’ll have warm cookies to eat in the car on the first leg of your road trip!

I hope you enjoy them as much as I did!

P1240941

Chewy Chocolate Cookies

makes a dozen

  • 1 banana
  • 3 tablespoons dark chocolate peanut butter (a tablespoon of cocoa powder and 3 tablespoons of peanut butter would probably work if you don’t have a chocolate peanut butter spread)
  • 1 cup oats
  • chocolate chips, optional

Preheat the oven to 350 degrees F. Process the banana and peanut butter in a food processor. If you don’y have a food processor, you can mash up the banana and peanut butter together. Stir in the oats.  Form into the dough into balls with a cookie scoop. Press down the balls so they are flatter. Bake for 12 minutes, or until the cookies are soft and chewy! Let cool, and enjoy!

Have a wonderful day!

xx Ellie

This post is part of Spring Break V, a collaboration among vegan and veg-friendly bloggers. Follow along on social media at #SpringBreakV. Want to learn more or become a contributor? Find out more here.

Samoas + My STRANGE Day

Baking soda doesn’t just help baked goods rise. It also neutralizes acid. Want to know how I know this?

It was a typical Tuesday morning (well except for the fact that it was St. Patrick’s day so I was wearing green and orange). I woke up, ate breakfast, and got ready for school like usual. I arrived in first hour with seconds to spare, like usual. In first hour, Chemistry, we did a lab, which is relatively usual.

The lab involved  Hydrochloric acid, and you can watch the first 5 minutes of this video to see what we did if you are really interested in chemistry and FIRE. The purpose of the lab was to combine the acid with zinc to create a reaction. Then we would capture the gas it released and determine its mass. We could light the collected gas on fire if we wanted, which was pretty cool.

However, near the end of the hour I looked down at my pants and noticed grayish colored spots on my bright orange pants. I first thought, “what is that?” Then I realized that I had somehow gotten acid on my pants! I had been measuring acid into a test tube, but I had no idea how it had gotten from the tube onto my pants! I told my teacher, Mr. L, that I got acid on my pants and he immediately got worried.

“Do you feel any pain in your legs? Any burning sensations?” He questioned.

“No…” I replied.

“Do you have any extra pants at school!?” he asked.

“Uh… I have gym shorts in my gym locker,” I answered, realizing that he probably wanted me to put them on. Keep in mind, it was 30-something degrees outside, so most sane people weren’t wearing shorts.

“Go as fast as you can and put them on!” He urged. So, I speed-walked to the gym lockers to put on my gym shorts, navigating through a crowd of orchestra students as I made my way. I hadn’t thought that getting acid on my pants would be a big deal, but apparently it was a big enough deal that I had to freeze in gym shorts for the rest of the day! I yanked off my pants and slid on my shorts. I bounced out of the locker room and into the hallway. There were only about 3 minutes left of class, so the hallways were pretty crowded. I had to maneuver around people who started at me and my acid pants to get back to the classroom. When I arrived, everyone was silent as Mr. L instructed me to take off my shoes and socks. “What in the world?” I thought.

Then it dawned on me: I was going to have to be sprayed off with copious amounts of water by the green chem wash station!

Mr. L instructed me to rub baking soda all over my legs. It sounds ridiculous, but the baking soda would neutralize the acid that may or may not have been on my skin. So, I massaged baking soda all over my pale, hairy legs. I couldn’t stop laughing at the ridiculousness of the situation! After my legs were covered in baking soda, Mr. L hosed down my legs with copious (Mr. L’s favorite word) amounts of water. Then I wiped myself off with scratchy brown paper towels.

My shorts got a little wet, but it was better than possibly having acid on my legs and getting acid burns (well duh).  Mr. L told me to contact my doctor if I felt any strange burning sensations. I couldn’t believe that a little acid could possibly be so harmful! Good thing it wasn’t! When my teacher finished hosing me down, he put baking soda all over my pants. We decided to leave the pants in his room so they could dry. With any luck, I’d be able to wear them again. 
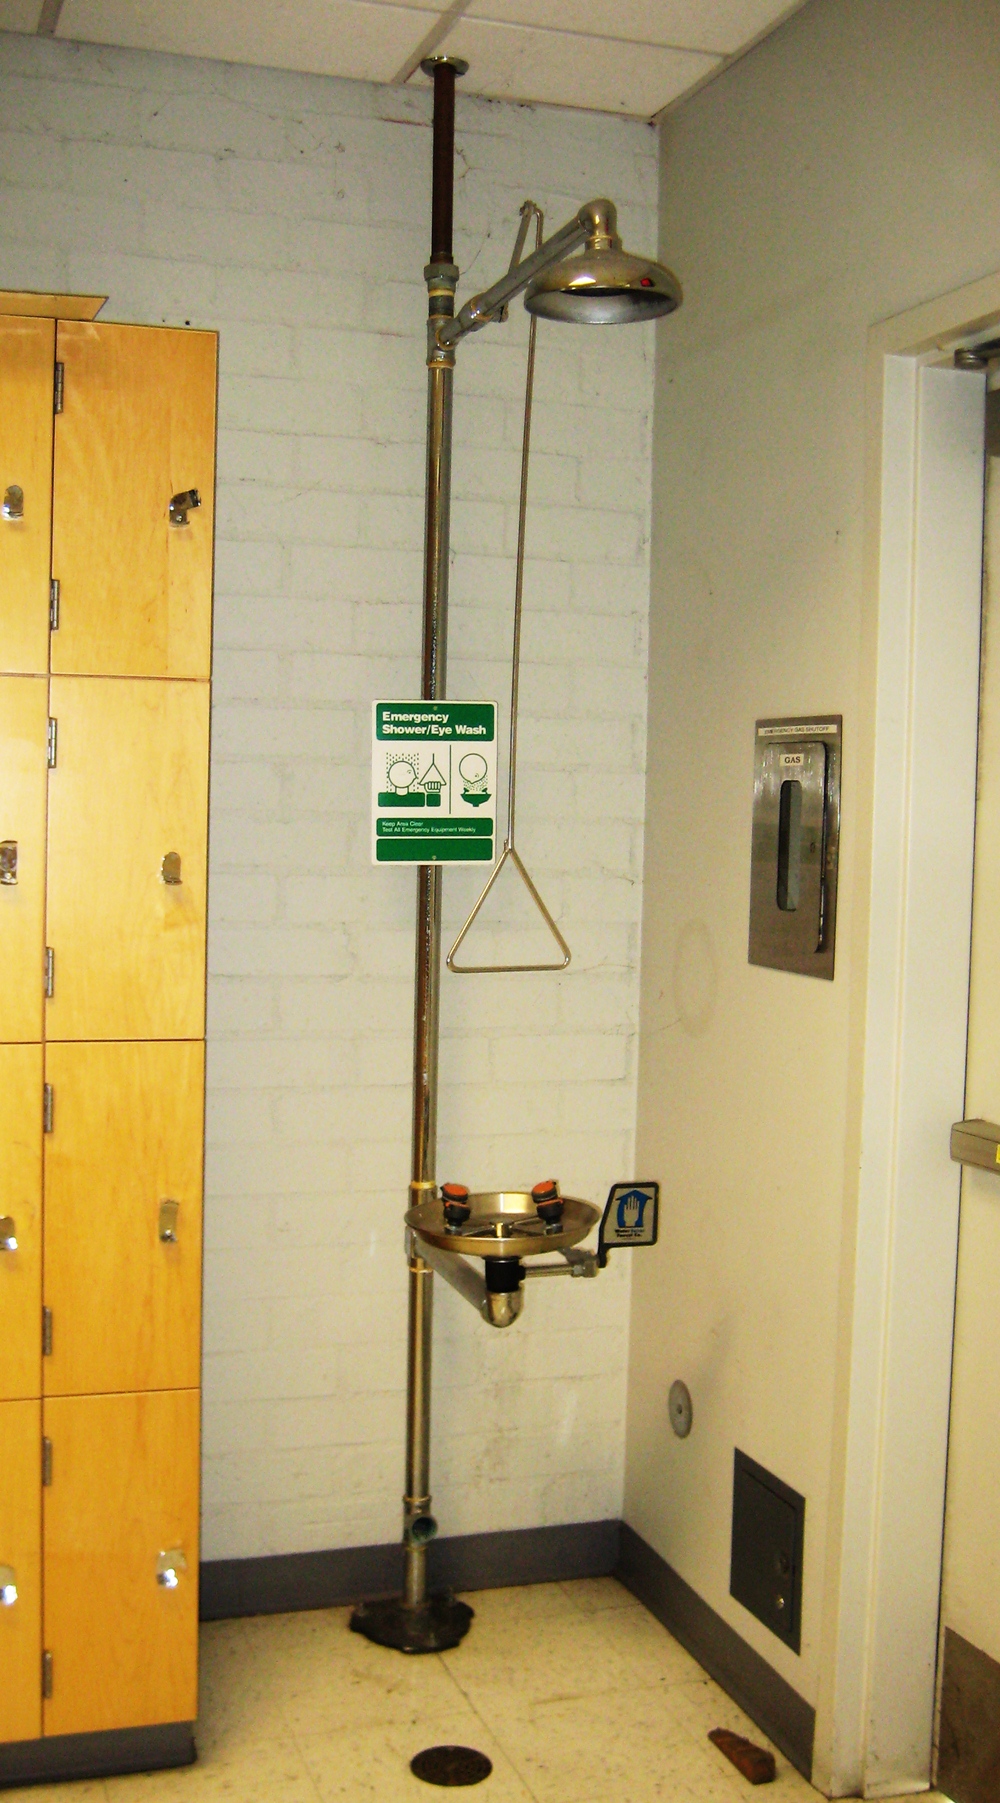
The bell had rung a few minutes before (but after I was rinsed down so my whole class got to watch that), so I grabbed my stuff and headed out of the classroom. I thought to myself that it was a good thing I was taking team games, or I’d probably have to get hosed down in my underwear. Or Mr. Larson’s lab coat.

All I can say is, good thing I was wearing pants!

At tennis practice after school, I told my tennis buddies about my adventure to acid land. Now my tennis coach is calling me the acid queen. I brought them treats and he asked if he would hallucinate if he ate one (he didn’t). Haha.

Now I’ll change the subject to food since this is a food blog and stuff. The treats I brought to my teammates were Samoas, and they were DELICIOUS! 7 healthy, wholesome ingredients. They’re also vegan, gluten free, practically raw, and almost sugar-free! Win-win-win! The recipe is from Chocolate Covered Katie.com. I used water instead of agave nectar for the recipe because the coconut I used was sweetened. I also made them into bars because that’s a whole lot easier than cutting them into cookie shapes. Dare I say they were better than Girl Scout Cookies? They were!

Here’s a picture of them from my Instagram: 

IMG_0890

So, my St. Patty’s day consisted of acid and Samoas. An interesting mix. It was an interesting and eventful day! I hope yours was too (in a good way)!

xx Ellie

Ps: have you ever been hosed off or had to use the eyewash machine in science class? Or, have you seen someone use it?

Peanut Butter Prints

I love peanut butter. I love jelly. I love peanut butter & jelly.

After all, I am peanut butter & Ellie!

These peanut butter cookies make a perfect snack or dessert. You can even just make the cookie dough and eat it because there are not any raw eggs in it (See photo below)! They’re soft, sweet, and delicious! Make and enjoy!

found on Pinterest

Peanut Butter Prints

adapted from Chocolate Covered Katie

makes around 15 cookies

For the Cookies:

  • 1/2 cup natural peanut butter (or another nut or seed butter if you are allergic to peanuts)
  • 3/4 tsp baking soda
  • pinch of salt
  • 3 tablespoons whole wheat flour
  • 1/4 cup raw cane sugar
  • 2 tbsp brown sugar
  • 1/4 tsp flaxseed meal + 3/4 tsp water mixed together to form a flax “egg” OR 2 Tbsp applesauce
  • 1 tablespoon non-dairy milk
  • 1/2 tsp vanilla extract

Cookie Toppings:

  • strawberry jam (homemade is best)
  • melted chocolate chip mixture (melt some chocolate chips in the microwave and stir them together) or some sort of chocolate spread
  • other types of jam

Preheat the oven to 350 degrees Fahrenheit. Mix dry ingredients (including peanut butter), then add in the wet ingredients. Form the dough into balls. Bake for 8 minutes. The cookies will magically flatten out (a lot) when baked. They will also look underdone. However, they will firm up! Make a little indent in the cookie and add a teaspoon or so of your favorite jam or spread (Nutella or a Nutella-like spread would be great on these cookies as well!) in the indent. Let cookies cool for at least 5 minutes before removing and devouring.

Have a nice day!

xx Ellie

Festive Sugar Cookies

One of my favorite holiday traditions is getting together with friends and making and decorating sugar cookies! It all started around 4 years ago, when I thought it would be fun to invite some of my closest friends over to make, bake, and decorate sugar cookies! Each year since, one of the main reasons that I can’t wait until the holiday season rolls around is so that I can invite friends over to decorate and eat cookies! The people who come change slightly from year to year, but the activity itself never changes.

The first year, we made non-vegan cookies with the store-bought frosting. Each year since, I’ve made a vegan and non-vegan version of cookies for my friends and I to enjoy! It’s a fun and delicious experience that exposes my friends to more vegan yumminess! It’s funny because now my core group of friends and I call each other “cookies” because of the cookie decorating party! What can I say, making cookies brings people together. 

These cookies make a great snack or dessert. They’re also a fun food to bring to one of the many parties you may be invited to this holiday season! Enjoy making and decorating festive cookies!

P1230056FESTIVE SUGAR COOKIES

makes 2 dozen

adapted from the sugar cookies in Chloe’s Vegan Desserts

  • 2 and ½ cups flour
  • 1 cup sugar
  • ½ tsp baking soda
  • 1 cup vegan margarine, such as Earth Balance
  • 4 tablespoons water
  • 1 teaspoon vanilla extract
  • optional: mix in a ½ cup of chocolate chips into the batter for a chocolate-y sugar cookie! 
  • frosting!
  • sprinkles!
  • more chocolate chips!!!

Preheat oven to 350 degrees F. Make sure the margarine is at room temperature. Mix together margarine, water, and vanilla. Add in flour, sugar, and baking soda and mix until just combined. If the dough is too runny, add a pinch more flour or cover the batter and put it in the fridge for 15 minutes. Roll the dough out into about 1/4 to 1/8″ thick with a rolling pin on a floured surface or on a parchment mat/ sheet. Cut it into shapes, place on a baking sheet, and bake for 8-10 minutes, or until the cookies are light brown and a bit crunchy. Frost with (vegan!) store-bought frosting or homemade frosting from  cookbook or the internet (we were lazy and juts used the store-bought stuff). Add sprinkles, chocolate chips, or whatever other topping your heart desires! Enjoy and spread the holiday cheer!

xx Ellie

This post is part of A Vegan Holiday, a collaboration among vegan and veg-friendly bloggers. Follow along on social media with #AVeganHoliday. Want to learn more or become a contributor? Find out more here or here

Hummingbird Cookies

I woke up today to an amazing surprise: no school! Today we got our first snow day of the year. Hooray for snow days! However, not hooray for icy roads and cold weather (the reason for snow days). I don’t mind the snow right now, but talk to me in January and my opinion will be very different.

I thought to myself ,”Now, what shall I do today?”

The answer: BAKE!

100_3333Hummingbird cookies came out of my snowy morning baking. I made hummingbird cupcakes this past weekend, and I love hummingbird cake, but I’ve never heard of or made hummingbird cookies! So I made some. They have similar ingredients and flavors  as hummingbird cake, but they’re in cookie form! “Hummingbird” is such a funny adjective for these cookies, especially since they’re vegan, but they’re like typical hummingbird cake ingredient-wise (pineapple, banana, coconut, and nut) and flavor-wise. It makes me wonder how someone came up with “hummingbird” to describe this flavor combo! I’m glad they did, because I love the flavor it entails!

Without further ado, I present the recipe to you!

100_3331

Hummingbird Cookies

by Ellie Haun

makes 12 cookies

  • 1 banana
  • 1/4 cup crushed pineapple
  • 1/8 cup flaxseed meal
  • ½ cup oats
  • 5 dates
  • 1/4 cup dried coconut
  • 1/8 cup walnuts
  • pinch of salt
  • ½ tsp cinnamon
  • ½ tsp vanilla

Preheat oven to 350 degrees F. Combine all ingredients in a food processor. Process until everything is combined and completely mixed together (it will take about a minute). Using a cookie scoop, scoop cookies onto a cookie sheet. The batter should make 12 or 13 cookies. Smush the cookies down with a flat object or your hands so the cookies are flat (not round). Sprinkle the tops of the cookies with dried coconut, then place in the oven and bake for 9 minutes. Let them cool, then enjoy!

These cookies make great outsides for banana ice cream cookie sandwiches! Make the cookies, then make banana ice cream (blend up a banana or two in your food processor with a few tablespoons of unsweetened nondairy milk). Place the banana ice cream in between two cookies, then enjoy!

Have a great day, and stay warm if it’s cold and snowy where you are! If not, enjoy the warmth you lucky duck!

xx Ellie